Integrating with billing provider
KuberLogic uses webhooks to integrate with various billing providers. Below you can find a scheme of core moving parts of a billing provider integration and instructions on how to set up ChargeBee to work with KuberLogic. Billing providers such as ChargeBee have ready-made components that you can easily integrate into your own site (create a pricing table, add products, set up a customer portal).
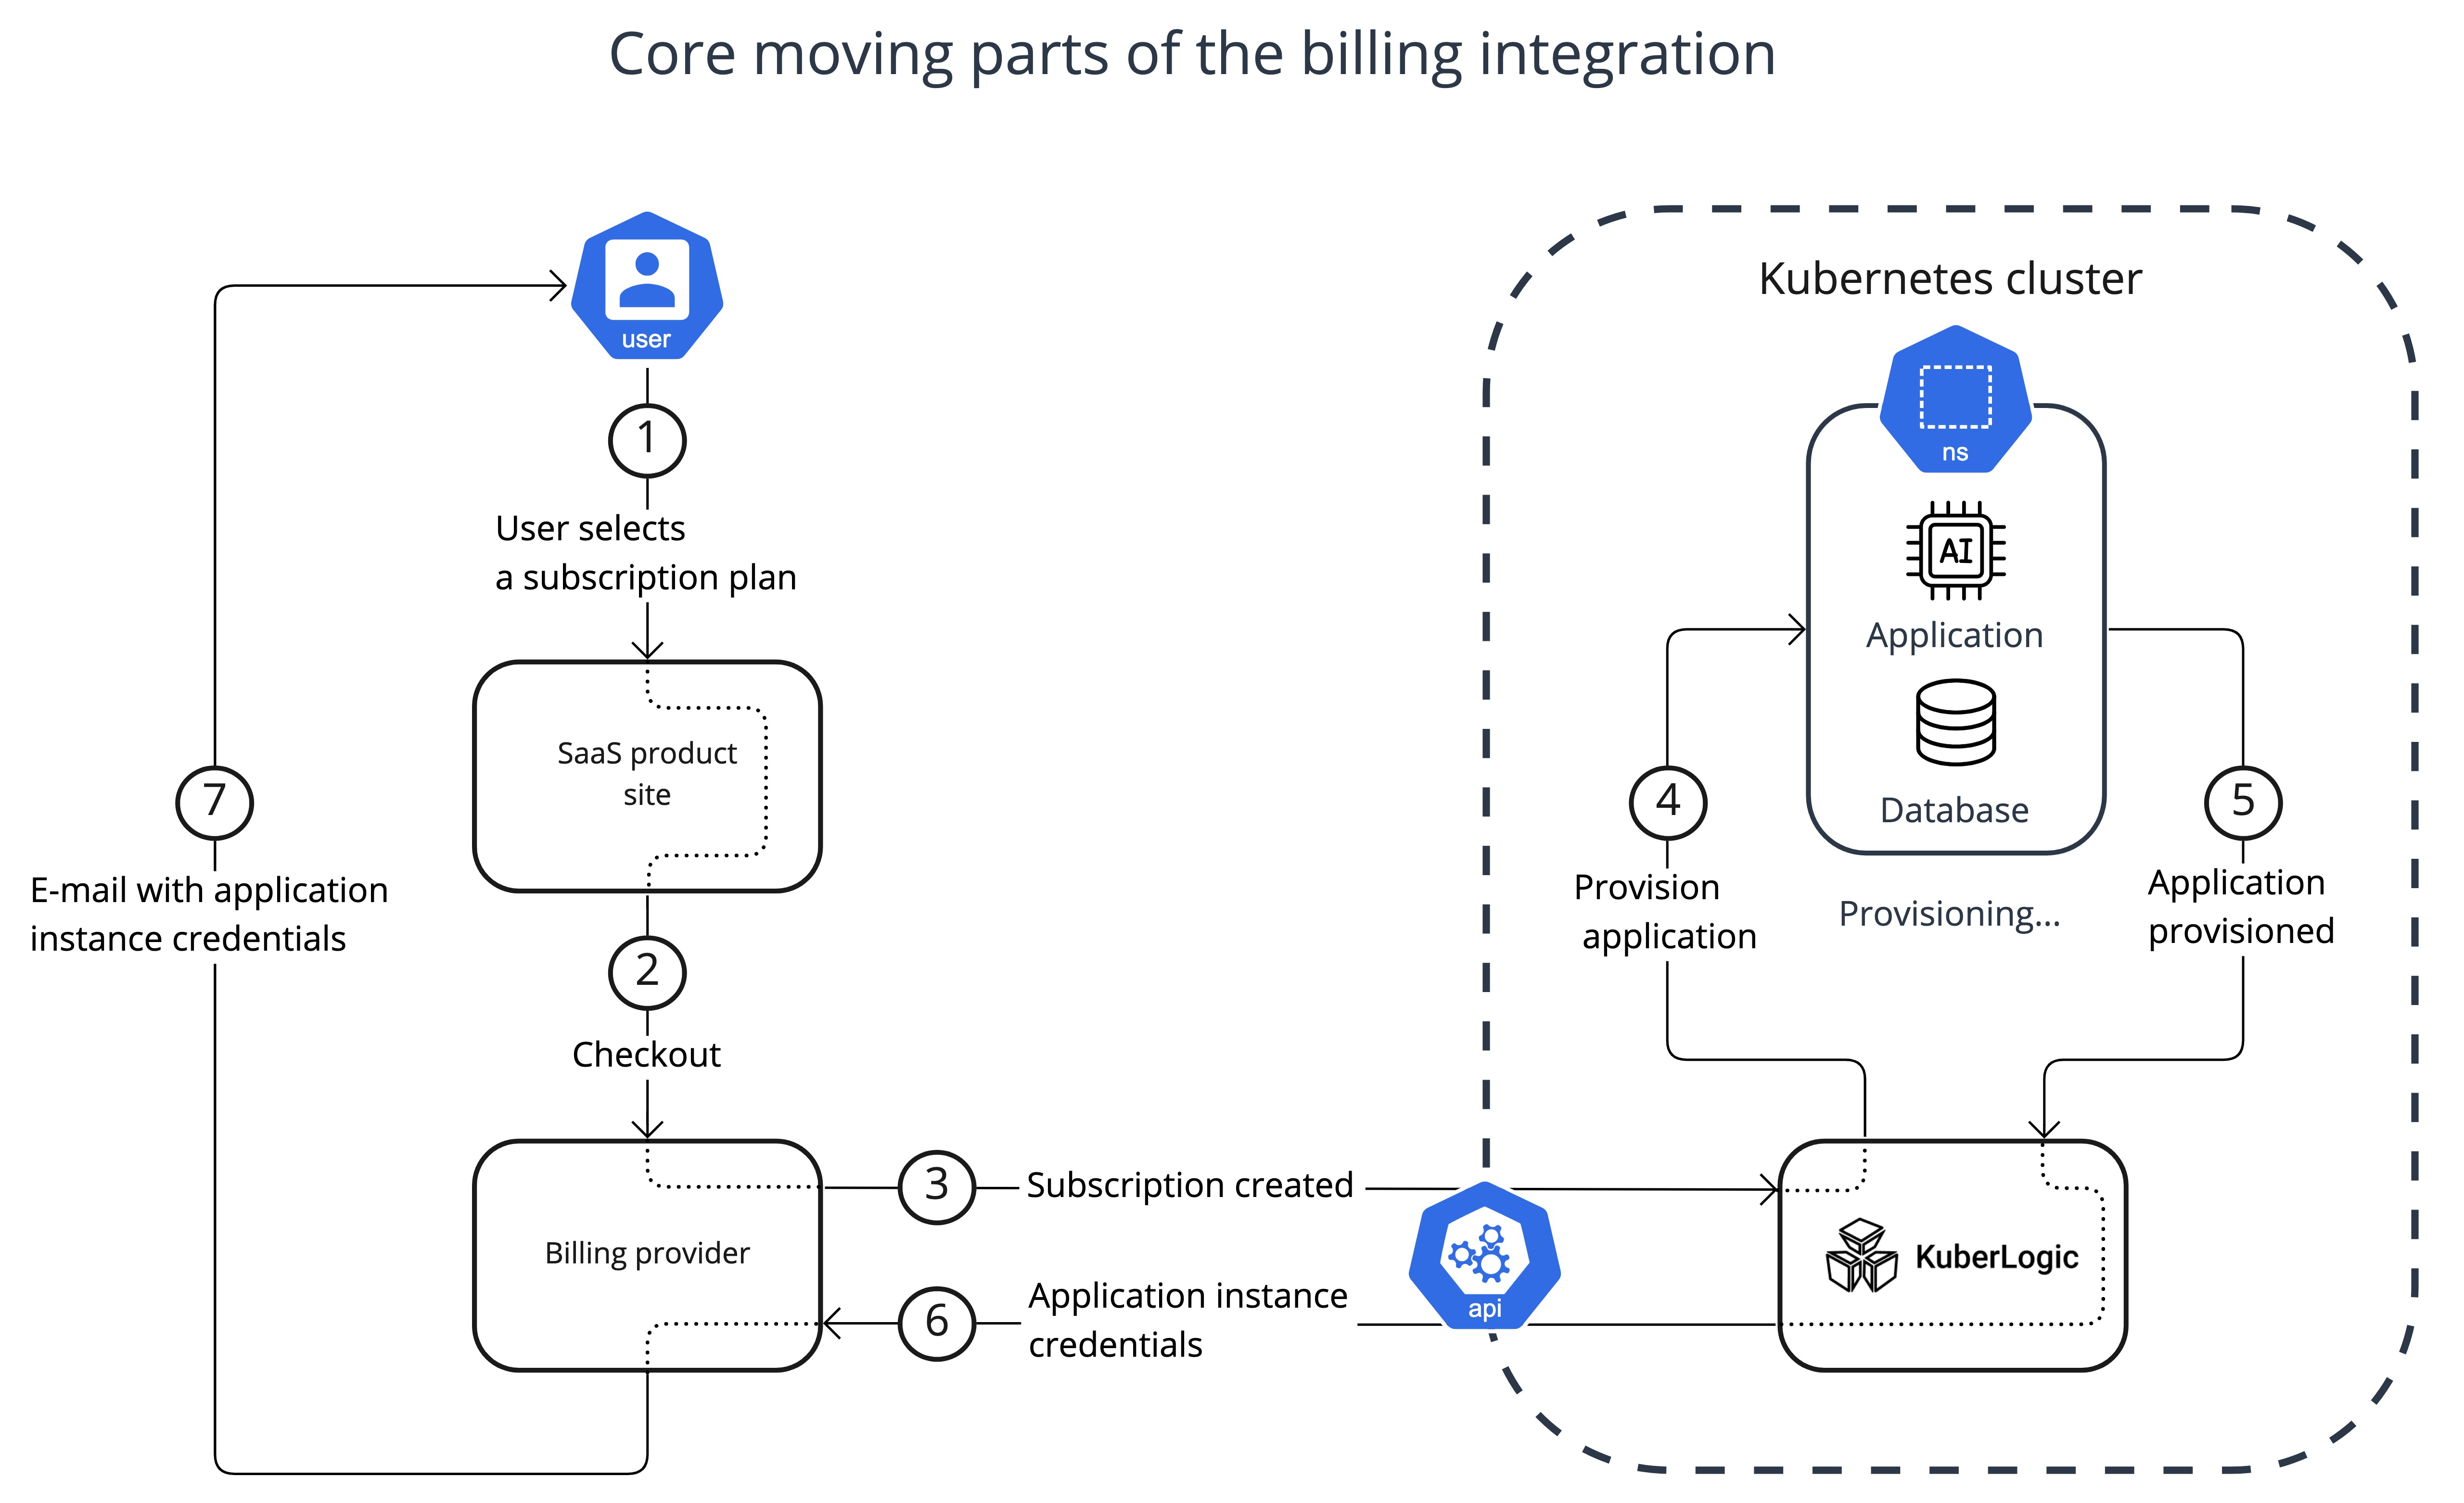
Step 1: Software vendors post a pricing table on a product site (Products and checkout). Users can choose a product from the pricing table and proceed to checkout. Also you need to add custom field "domain" (as in example below) that will be updated by KuberLogic once application instance is ready.

Step 2: The billing provider charges the user in accordance with the chosen subscription plan.
Step 3: The billing provider sends an event via Webhook to KuberLogic.
Step 4: KuberLogic generates a subdomain name for the application instance, provisions an application instance in accordance with the chosen subscription plan, and ensures application availability.
Step 5-6: After the application instance is provisioned KuberLogic make an API call to the Billing provider with the application instance domain name information. This is updating the user's subscription with the domain.
Step 7: On the
subscription updateevent Billing provider sends an e-mail Your subscription has been updated to the User with the application domain name added to the e-mail custom field. You can customize the e-mail template to something like Your application instance is provisioned! and add to the template previously created custom field.Additional: You should add a link to the Customers portal to your application to allow users to manage the subscription Single Page Customer Portal
Configuring KuberLogic
You will be asked to configure Chargebee integration during the installation process. Leaving Chargebee site parameter empty will disable Chargebee integration.
- kuberlogic_domain - configuration parameter is used by KuberLogic as a base domain. Subdomains will be generated for the application instances (e.g. http://magnetic-llama.example.com, http://pleasant-antelope.example.com)
Example:
  - chargebee_site=example-test
  - chargebee_key=test_aTwdMcu4LDMU3eCadmXCJYcubL60tGDYbGeUg
  - kuberlogic_domain=example.com
Webhook configuration example:
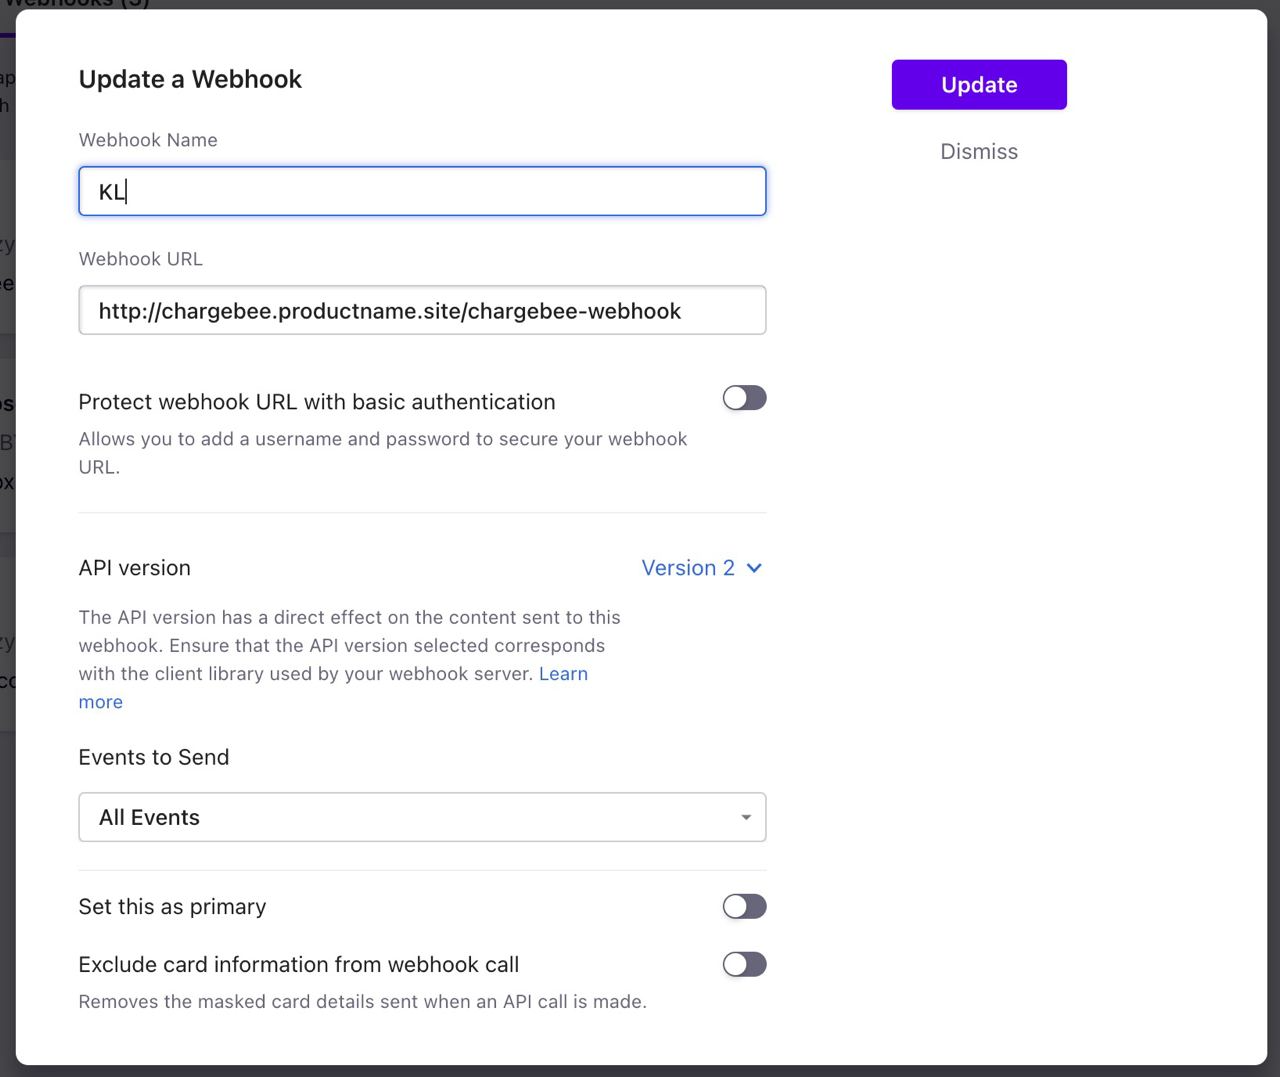
Webhook URL should lead to "kls-chargebee-integration" service External IP.
Type to see the IP:
$> kubectl get svc -n kuberlogic
Example output
NAME                                     TYPE           CLUSTER-IP   EXTERNAL-IP      PORT(S)        AGE
kls-api-server                           LoadBalancer   10.8.10.73   34.121.153.159   80:31098/TCP   5h19m
kls-chargebee-integration                LoadBalancer   10.8.10.7    34.135.30.100    80:32415/TCP   5h19m
kls-controller-manager-metrics-service   ClusterIP      10.8.4.214   <none>           8443/TCP       5h19m
kls-webhook-service                      ClusterIP      10.8.15.55   <none>           443/TCP        5h19m
Mapping custom fields
You will create any custom fields which you can show on the Customer Portal. You able to map this fields to any kuberlogic parameters.
All of available parameters:
./kuberlogic service add --help
Adds service object

Usage:
  kuberlogic service serviceAdd [flags]

Aliases:
  serviceAdd, add

Flags:
      --backup_schedule string   backup schedule in cron format
  -h, --help                     help for serviceAdd
      --id string                service id
      --limits.cpu string        cpu limits
      --limits.memory string     memory limits
      --limits.storage string    storage limits
      --replicas int             how many replicas need for service (default 1)
      --subscription_id
      --tls_enabled
      --type string              type of service
      --version string           what the version of service
For example, you can use different volume size for your subscription plans (e.g. Base Plan - 5Gb, Standard - 10Gb, Premium - 20Gb). Then you have an ability to create services based on your subscription plan - you should add mapping from custom field to kuberlogic service add parameter to the modules/dynamic-operator/config/manager/mapping-fields.yaml before installation:
- src: volume_size
  dst: limits.storage
It's yaml file and should be valid after editing.
You able to create any custom fields and map it into any parameters of service add command.